Most people treat hair masks like an afterthought — something they slather on once a month when their hair “feels dry,” leave in for two minutes because they’re in a rush, and then wonder why nothing changed.
That’s not a hair mask problem. That’s a technique problem.
A hair mask, used correctly, is one of the few at-home treatments that can genuinely reverse damage — not just mask it with silicone shine for a day. But “correctly” is doing a lot of work in that sentence, and most of what circulates online about hair masks skips the details that actually matter: how often, how long, which ingredients pair with which hair type, and why your $40 mask might be doing less than an $8 one.
This guide covers all of it. By the end, you’ll know exactly which mask to reach for, how to apply it so it actually penetrates the hair shaft instead of sitting on top, how to tell the difference between a mask that’s working and one that’s just coating your hair temporarily, and which habits are quietly sabotaging your results.
What a Hair Mask Actually Does (And Why It’s Different From Conditioner)
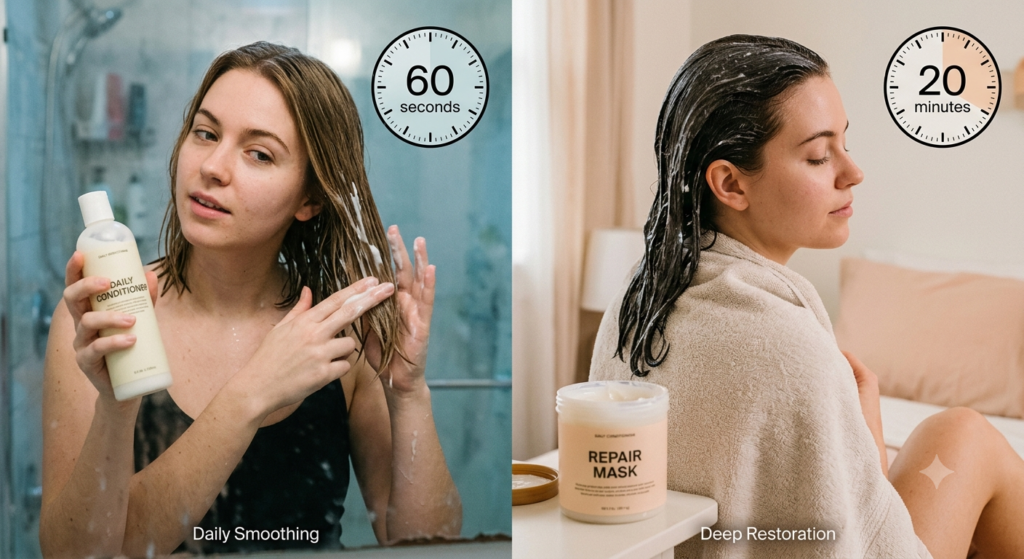
Before getting into frequency and formulas, it helps to understand what separates a mask from a regular conditioner, because the two get used interchangeably in casual conversation and they shouldn’t be.
Regular conditioner is designed to coat the outside of the hair shaft. It smooths the cuticle, reduces friction between strands, and makes hair easier to detangle and style. It works fast — usually in under a minute — because it isn’t trying to change the internal structure of the hair.
A hair mask is formulated to penetrate past the cuticle and into the cortex, the inner layer of the hair where moisture, proteins, and structural bonds actually live. This is why masks need longer processing time and often benefit from heat: the ingredients are working on a deeper level, not just smoothing the surface.
Think of conditioner as a quick coat of paint and a mask as patching the drywall underneath. Both matter, but they solve different problems. Skipping masks entirely and relying only on conditioner means you’re maintaining the surface while ignoring the structural damage underneath — which is why hair can look shiny after a wash and still snap when you brush it.
How Often You Should Actually Use a Hair Mask
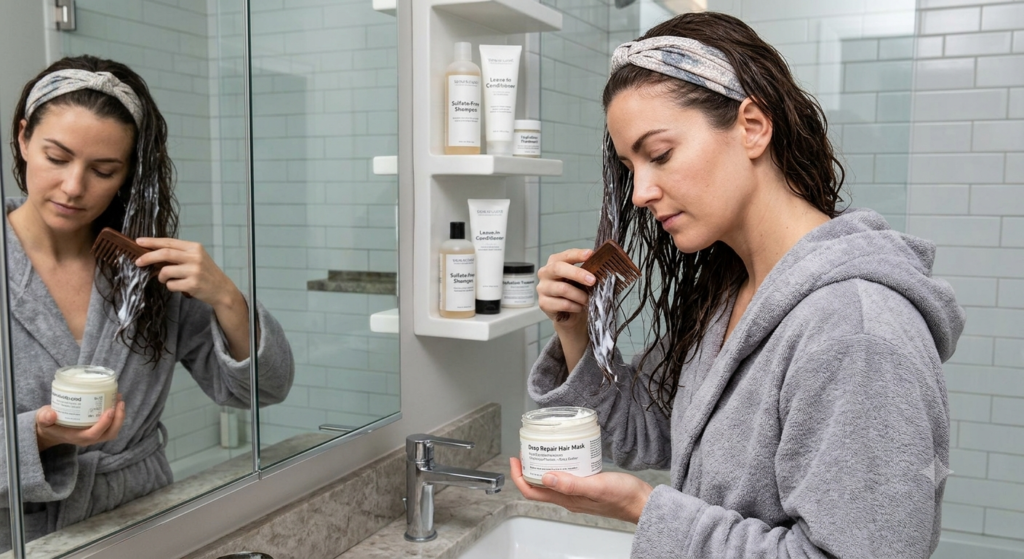
There’s no universal answer here, and anyone who tells you “once a week, always” is oversimplifying.
Frequency depends on three things: your hair’s porosity, how much chemical or heat damage it’s carrying, and what’s actually in the mask.
A general starting framework:
| Hair Condition | Suggested Frequency |
|---|---|
| Fine, healthy, minimal damage | Every 2–3 weeks |
| Normal to slightly dry | Weekly |
| Color-treated or heat-styled regularly | 1–2 times per week |
| Chemically damaged (bleached, relaxed) | 2–3 times per week |
| Very fine or oily-at-the-roots hair | Every 2 weeks, roots avoided |
Here’s the nuance most articles leave out: protein-based masks and moisture-based masks are not interchangeable, and overusing either causes different problems.
Too much protein (keratin, hydrolyzed wheat protein, collagen) makes hair feel stiff, brittle, and prone to snapping — a state often called “protein overload.” This is more common than people realize, especially among those who follow trending “protein treatment” routines without checking whether their hair actually needs it.
Too much moisture without protein makes hair feel mushy, gummy, and limp when wet, and it loses elasticity. You’ll notice this most clearly when wet hair stretches significantly before breaking, or when it takes unusually long to dry.
If your hair feels straw-like and breaks easily, you likely need protein. If it feels stretchy, gummy, or collapses with no bounce, you need moisture. Most people default to moisture masks because they’re more common on shelves, which is part of why protein deficiency is so widespread in color-treated hair.
A Simple Test You Can Do at Home
If you’re unsure whether you’re protein-deficient or moisture-deficient, try this: take a single strand of freshly washed, wet hair and gently stretch it. Healthy hair will stretch slightly and bounce back. Hair that stretches a lot and doesn’t return to its original length, or that breaks with almost no resistance, is telling you something specific — and it’s worth paying attention to rather than guessing at the store shelf.
DIY vs. Store-Bought Hair Masks
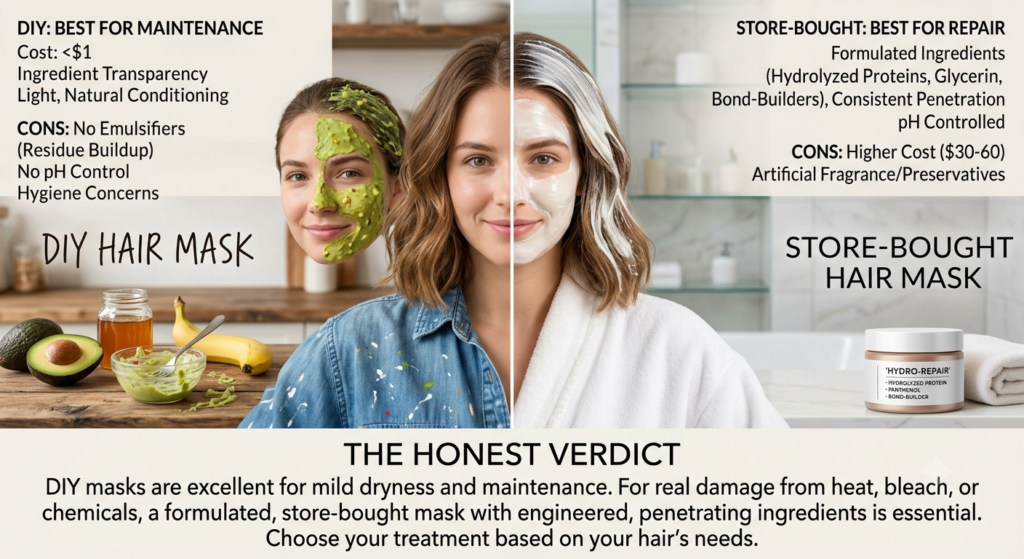
Pinterest is full of DIY hair mask recipes — avocado and honey, coconut oil and egg, banana and yogurt. Some of these genuinely work. Others are more folklore than function. Here’s an honest breakdown.
Where DIY Wins
Cost. A banana-and-honey mask costs less than a dollar. A salon-brand mask can run $30–60.
Ingredient transparency. You know exactly what’s touching your hair — useful if you’re sensitive to fragrance or preservatives.
Light, natural conditioning. Ingredients like honey (a humectant) and yogurt (mild lactic acid) can genuinely soften hair and smooth the cuticle for fine or normal hair types.
Customization. You can adjust ratios based on how your hair responds, something you can’t do with a pre-formulated jar.
Where DIY Falls Short
No emulsifiers. Oils like coconut or olive oil don’t rinse out cleanly without proper surfactants, which often means residue buildup — especially on fine hair, where it can look greasy rather than healthy.
Inconsistent penetration. Raw egg, avocado, or mayonnaise sit largely on the hair’s surface. They can add temporary softness and shine, but they don’t restructure damaged hair the way formulated proteins or bond-building ingredients do.
No pH control. Hair thrives at a slightly acidic pH (around 3.5–5.5). Many DIY ingredients — baking soda in particular — are alkaline and can actually roughen the cuticle, causing more frizz and dryness over time, not less.
Shelf life and hygiene concerns. DIY masks with dairy or egg need to be used immediately and rinsed thoroughly with cool water, since heat can cause protein to cook onto the hair shaft, leaving an odd texture that’s difficult to remove.
Where Store-Bought Wins
Formulated masks contain hydrolyzed proteins (small enough to penetrate the cortex), humectants like glycerin or panthenol, and often bond-building technology (like bis-aminopropyl diglycol dimaleate) that DIY simply cannot replicate at home. These ingredients are engineered at a molecular size specifically so they can pass through the cuticle rather than just sit on top of it.
The honest verdict: DIY masks are excellent for maintenance and mild dryness. If you’re dealing with real damage — bleach, heat, chemical relaxers — a formulated mask with actual protein and moisture-balancing ingredients will outperform anything from your kitchen. Think of DIY as hair care and store-bought as hair repair.
Choosing the Right Hair Mask for Your Hair Type
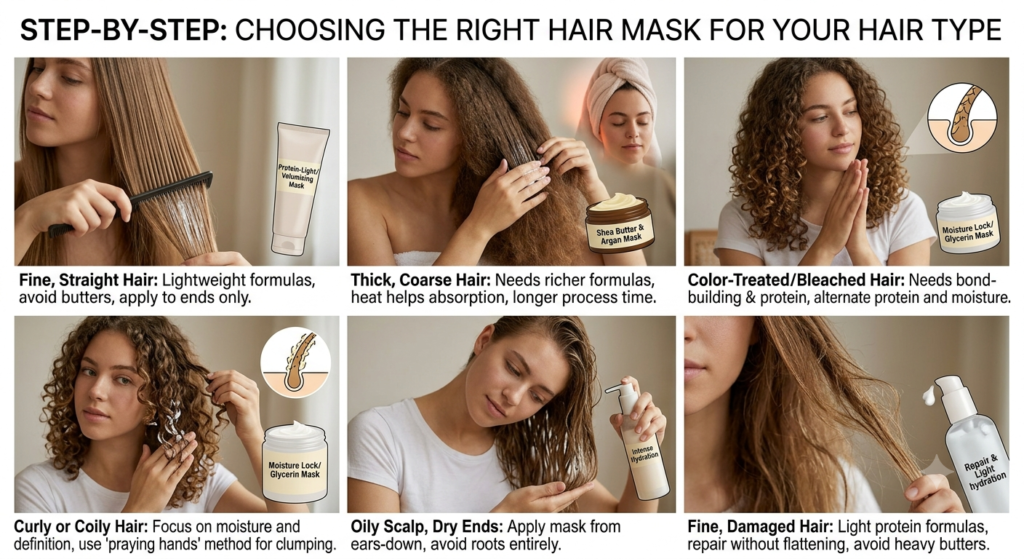
This is the section most guides skip entirely, and it’s the reason so many people buy a mask, use it faithfully, and still feel disappointed.
Fine, Straight Hair
Look for lightweight, protein-light formulas. Heavy butters (shea, cocoa) and oils (coconut, argan in high concentrations) will weigh fine hair down and can make it look flat or greasy at the roots. Apply from mid-shaft to ends only — never the scalp. If your mask feels heavy even after rinsing, it’s likely too rich for your hair’s natural density.
Thick, Coarse Hair
This hair type can handle — and usually needs — richer formulas with shea butter, oils, and longer processing times. Coarse hair has a harder time absorbing product due to a tighter cuticle, so heat (a shower cap plus a warm towel) genuinely helps here more than with any other hair type. Don’t be afraid to leave a rich mask on for the full 20–30 minutes if the label allows it.
Curly or Coily Hair
Moisture retention is the primary challenge, since natural oils from the scalp travel more slowly down the hair’s curve pattern. Look for masks with glycerin, aloe, and slip-heavy silicones or natural oils. Apply generously and consider the “praying hands” method — smoothing product downward in sections to encourage clumping and reduce frizz. Curly hair often benefits from masking more frequently than other types simply because moisture doesn’t travel down the shaft as efficiently.
Color-Treated or Bleached Hair
Prioritize bond-building or protein-repair masks (look for words like “bond repair,” “keratin,” or “amino acids” on the label). Color-treated hair has literally broken internal bonds from the lightening process, and moisture alone won’t rebuild that structure — it needs protein to patch it. Alternate between a protein mask and a moisture mask rather than using only one type, since bleached hair typically needs both.
Oily Scalp, Dry Ends (a very common combination)
Apply the mask only from ears-down, avoiding the scalp entirely. Using a rich mask at the roots when your scalp already overproduces oil creates buildup and can actually shorten the time between washes. If your ends are significantly drier than your roots, consider masking your ends on off-wash days using just water and a leave-in, saving the full mask treatment for wash day.
Fine Hair That’s Also Damaged
This is a tricky combination because fine hair can’t handle heavy formulas, but damage often calls for richer treatment. The solution is usually a lightweight protein mask rather than a heavy moisturizing one — protein won’t weigh hair down the way butters and oils do, so you get repair without the flatness.
Common Hair Mask Mistakes That Ruin Results
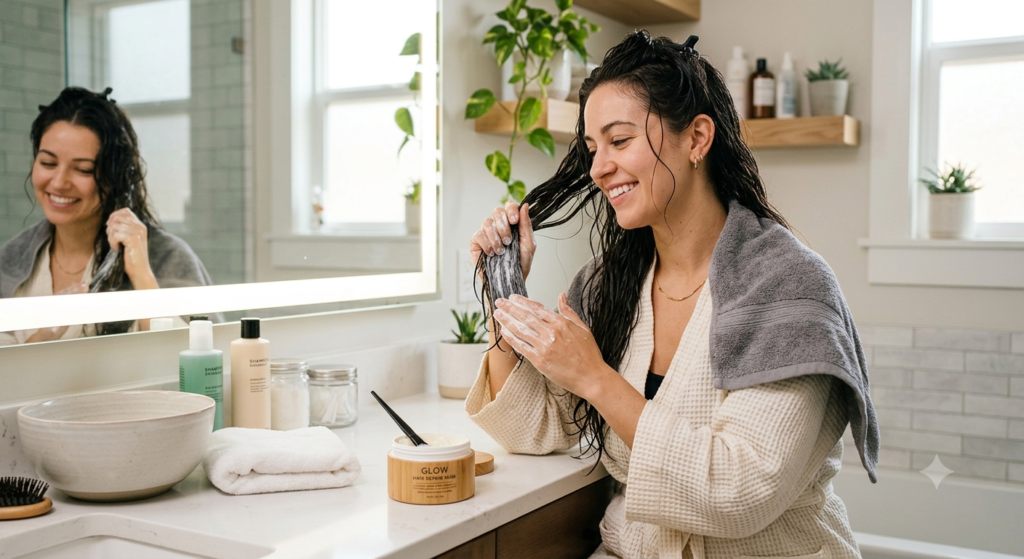
Even with the “right” mask, technique errors are the most common reason people don’t see improvement.
Applying to dirty, product-laden hair. Masks work best after a clarifying or regular shampoo, when the hair shaft is clean and receptive — not coated in old conditioner, dry shampoo, or styling product residue.
Leaving it on for far less time than directed. Most people rinse after 2–3 minutes because they’re multitasking in the shower. Formulated masks typically need 10–20 minutes to actually penetrate; DIY masks often need even longer since their molecules are larger.
Skipping heat when the label suggests it. Heat opens the cuticle, allowing better absorption. A warm towel or shower cap makes a measurable difference, especially for coarse or curly hair.
Using a heavy mask every single wash. This leads to buildup, which paradoxically makes hair feel drier because it interferes with regular moisture absorption from conditioner and leave-ins.
Applying mask to the scalp when it’s meant for the lengths. Most masks are formulated for mid-shaft to ends, where damage accumulates. Scalp application can clog follicles or leave roots greasy.
Not adjusting for protein vs. moisture needs. As covered earlier, choosing based on marketing (“repair,” “hydrate”) without checking actual ingredients often means guessing rather than treating the specific issue.
Rinsing with very hot water. Hot water reopens the cuticle you just worked to smooth. A cool rinse at the end helps seal it back down and boosts shine.
Expecting one use to fix months of damage. A single mask application can improve texture temporarily, but real structural repair takes consistent use over several weeks. Judging a mask after one try is one of the most common reasons people abandon a product that would have worked with patience.
Ignoring the ingredient order on the label. Ingredients are listed by concentration, highest first. If water is followed immediately by silicones with the actual active ingredients (proteins, oils) buried near the bottom of the list, you’re mostly paying for a smoothing agent rather than a repair treatment.
How to Apply a Hair Mask the Right Way
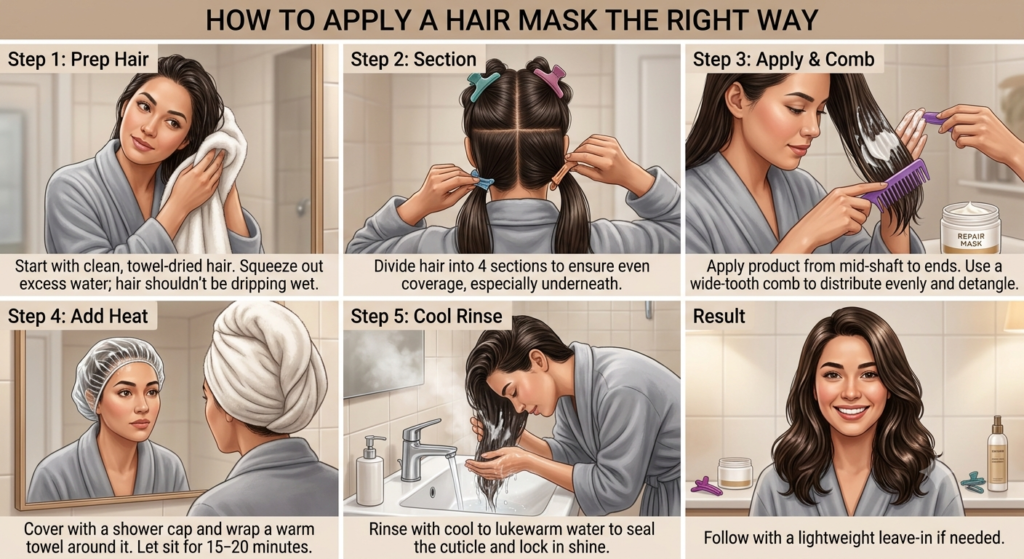
Here’s the step-by-step process that actually maximizes results, whether you’re using a DIY recipe or a $50 salon jar.
Step 1: Start with clean, towel-dried hair. Wash with shampoo first. Squeeze out excess water — hair that’s dripping wet dilutes the mask and reduces absorption.
Step 2: Section your hair. Divide into 4 sections. This ensures even coverage instead of concentrating product on the top layer while the underneath stays untreated — a very common oversight, especially with thick or long hair.
Step 3: Apply from mid-shaft to ends (unless the label says otherwise). Use a wide-tooth comb to distribute evenly. This also detangles gently while the hair is slippery and less prone to breakage.
Step 4: Add heat. Cover with a shower cap and wrap a warm towel around it, or use a hooded dryer if you have one. Aim for 15–20 minutes. If you don’t have a hooded dryer, a warm towel reheated once halfway through works nearly as well.
Step 5: Rinse with cool to lukewarm water. This seals the cuticle and locks in shine.
Step 6: Follow with a lightweight leave-in if needed. Not always necessary, but helpful for curly or very dry hair to lock in extra moisture.
Quick Checklist Before You Rinse:
- Hair was clean before application
- Product reached mid-shaft to ends evenly
- Mask sat for at least 10–15 minutes
- Heat was used if the hair type benefits from it
- Rinse water was cool, not hot
How to Tell If a Hair Mask Is Actually Working
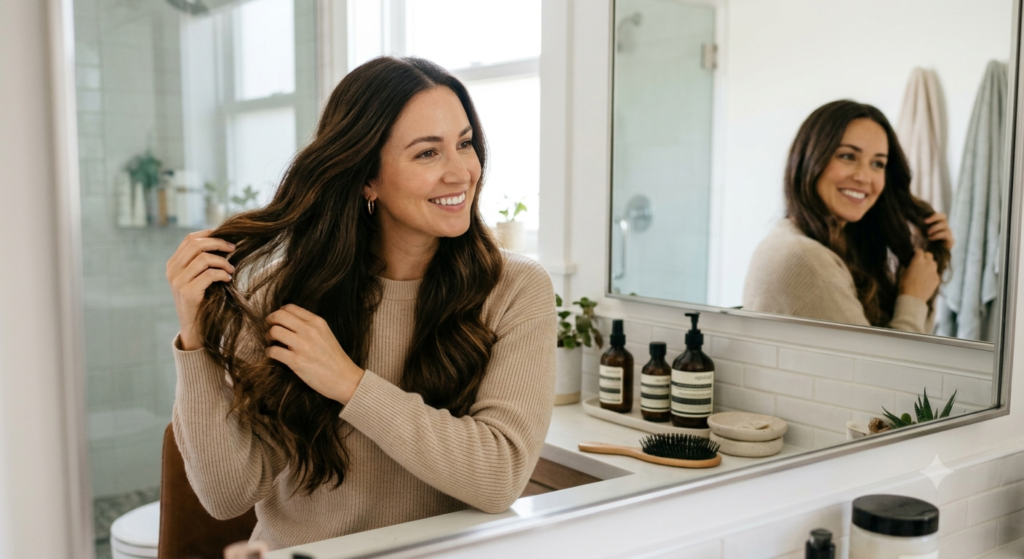
Because results build gradually, it’s easy to lose track of whether a mask is helping. Watch for these signs over a two-to-three-week period rather than after a single use:
Hair takes longer to feel dry to the touch, and less product is needed to detangle. Breakage during brushing decreases noticeably. Hair holds curl or style longer without frizzing. Split ends stop multiplying as quickly, even though existing split ends won’t repair themselves — no mask can fuse hair back together once it’s split, despite what packaging sometimes implies.
If none of these improve after a month of consistent, correct use, the issue is usually a mismatch between the mask’s formula and what your hair actually needs, not a failure of masking as a method.
Frequently Asked Questions
Can I use a hair mask instead of conditioner? Not as a full replacement long-term. Conditioner is a light daily maintenance step; a mask is a more concentrated, occasional treatment. Skipping conditioner entirely in favor of masks alone can leave hair under-moisturized between treatments.
Do hair masks work on the scalp too? Most are formulated for the lengths, not the scalp. If you want scalp-specific treatment, look for a dedicated scalp mask or scrub rather than applying a hair mask meant for ends.
Why does my hair feel worse after a protein mask? This usually signals protein overload — your hair didn’t need more protein, or the mask was left on too long. Switch to a moisture-only mask for the next two to three washes to rebalance.
Is it bad to leave a hair mask on overnight? For most formulated masks, this isn’t necessary and can occasionally cause over-conditioning or product buildup. Follow label directions — more time isn’t always better time.
Can a hair mask repair split ends? No mask, DIY or store-bought, can permanently fuse split hair back together. What a good mask can do is smooth the surrounding cuticle so splits are less visible and less likely to travel further up the strand. The only permanent fix for split ends is trimming them off.
Should I mask before or after using a clarifying shampoo? After. Clarifying shampoo strips buildup and opens the cuticle slightly, which actually improves how well the mask’s ingredients can penetrate afterward.
Key Takeaways
A hair mask isn’t a one-size-fits-all fix — it’s a targeted treatment that only works when it’s matched to your hair’s actual needs, applied with the right technique, and used at a frequency that fits your hair’s condition, not just a generic weekly rule.
If you take one thing from this guide, let it be this: figure out whether your hair needs protein or moisture before you buy anything. That single distinction will save you more frustration than switching brands ever will.
Start simple — pick one mask suited to your hair type, apply it using the steps above, and give it three to four uses before judging the results. Real change in hair health shows up over weeks, not overnight, and consistency with the right formula will always outperform an expensive product used incorrectly.