Standing in the hair color aisle with six different boxes in your hands is its own kind of stress test. Permanent or semi-permanent? Ammonia-free or not? Will this shade actually look like the picture, or will you end up with hair that’s somehow both orange and purple?
Most guides list ten random products and call it a day. This one doesn’t. Instead, you’ll get a clear framework for matching a formula to your actual hair — its condition, porosity, and your color goal — plus the specific mistakes that turn a good product into a bad result. By the end, you’ll know exactly which type of dye belongs in your cart and how to use it so the color holds.
How to Pick the Right Formula for Your Hair Type
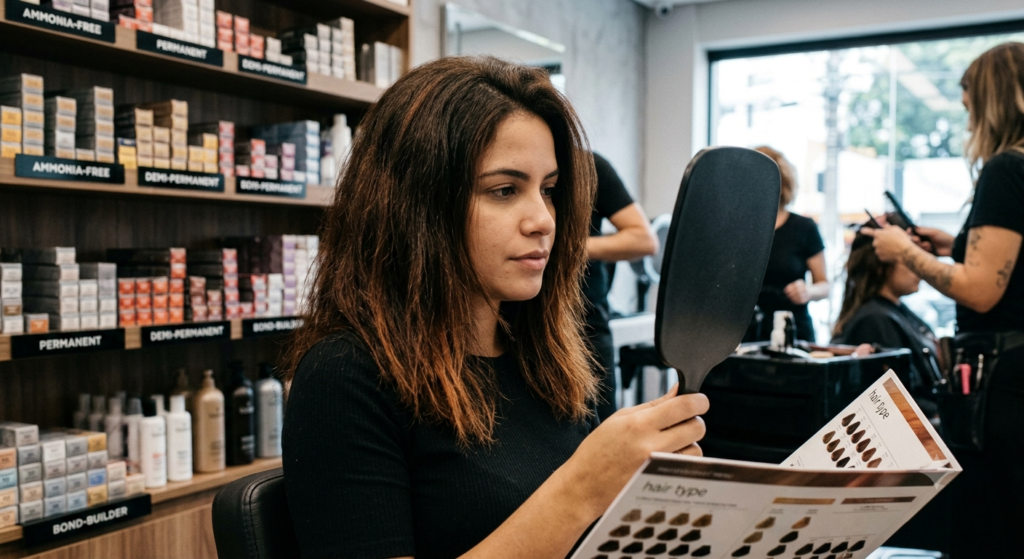
Before you even look at a shade name, your hair’s current condition should decide which category of dye you buy. This is the step most people skip, and it’s why the same box dye gives one person gorgeous color and another person straw-like ends.
If your hair is virgin (never colored) and healthy: You have the most flexibility. Permanent dye will process evenly because there’s no existing color or damage interfering with absorption. This is the easiest scenario, and it’s why first-time colorers often assume all dye is this forgiving — it isn’t.
If your hair is previously colored or has highlights: Porosity is uneven, meaning color will grab faster and darker in some spots than others. A demi-permanent or gentler permanent formula gives you more control and reduces the risk of banding (visible stripes where old and new color meet).
If your hair is chemically treated (relaxed, permed, or keratin-treated): Skip anything with high ammonia content. These treatments already stress the hair’s protein structure, and stacking a harsh dye on top significantly increases breakage risk. Ammonia-free permanent or semi-permanent formulas are the safer lane here.
If your hair is fine or fragile: Fine hair absorbs dye quickly but also loses moisture quickly during processing. Look for formulas with built-in bond-building or conditioning technology (many mid-range and premium box dyes now include this) rather than the cheapest option on the shelf.
If your hair is coarse or resistant to color: Coarse hair has a tighter cuticle layer, so gray coverage and vivid tones often need extra processing time or a slightly stronger permanent formula to fully penetrate the shaft.
A quick gut check: if you’re not sure which category you fall into, treat your hair as “compromised” rather than “virgin.” It’s the safer assumption, and it will steer you away from formulas too harsh for what your hair can currently handle.
Permanent vs. Semi-Permanent vs. Demi-Permanent (Explained Simply)
This is the single most confusing part of buying hair dye, and brands don’t make it easier by using inconsistent labeling. Here’s what each type actually does, in plain terms.
| Type | Lifts Natural Color? | Covers Gray? | Lasts | Best For |
|---|---|---|---|---|
| Permanent | Yes | Yes, fully | Until new growth | Gray coverage, major color change |
| Demi-Permanent | No (deposits only) | Blends, doesn’t fully cover | 4–6 weeks | Refreshing tone, low-commitment color |
| Semi-Permanent | No | No | 6–12 washes | Fun colors, testing a shade, damaged hair |
Permanent dye opens the hair cuticle and uses developer (usually peroxide) to both lift your natural pigment and deposit new color. This is the only category that fully covers gray, which is why anyone coloring for gray coverage should default here regardless of the “gentler” appeal of other options.
Demi-permanent dye uses a low- or no-peroxide developer. It can’t lighten hair, only deposit color, which makes it a great low-risk way to enrich tone, correct brassiness, or blend early grays without full commitment.
Semi-permanent dye sits on top of the hair shaft with no developer involved at all. It’s the gentlest option and the best choice for anyone whose hair is already damaged or who wants to experiment with a bold or fashion color before committing.
A mistake worth naming here: a lot of people buy semi-permanent dye expecting it to cover gray, get frustrated when it fades in a week and the gray shows through again, and conclude “this brand doesn’t work.” The product wasn’t the problem — the category was the wrong choice for the goal.
Best Hair Dye Products by Hair Goal

Rather than one generic “top 10” list, here’s what actually performs well depending on what you’re trying to achieve.
For Full Gray Coverage
Look for permanent formulas specifically labeled for gray coverage — these usually have a slightly higher developer volume and more concentrated pigment load, since gray hair is more resistant to absorbing color than pigmented hair. Root-touch-up specific kits are worth it if you’re only covering regrowth, since they’re formulated to blend seamlessly into existing color rather than create a full, even shade.
For a Natural, Low-Maintenance Change
Demi-permanent formulas in a shade close to your natural color are the easiest to maintain, since regrowth is far less noticeable. These are also the most forgiving for at-home application because there’s less risk of a harsh line where new dye meets old.
For Vivid or Fashion Colors
Semi-permanent, direct-dye formulas (no developer mixing required) are the standard choice. These work best on pre-lightened hair — vivid colors do not show true on dark, unlightened strands, which is one of the most common disappointments people run into with fantasy colors.
For Damaged or Over-Processed Hair
Ammonia-free demi-permanent or semi-permanent options reduce further protein damage. Pairing the dye with a bond-repair treatment (used before or mixed into the process, depending on the brand) meaningfully reduces breakage compared to dyeing alone.
For Budget-Conscious Colorers
Mid-tier box dyes with built-in conditioning treatments now perform close to salon-level results for solid, single-process color. The biggest gap between budget and premium isn’t usually the color payoff — it’s the quality of the included conditioning treatment and the consistency of the applicator.
Ingredients Worth Paying Attention To (and Ones to Watch For)
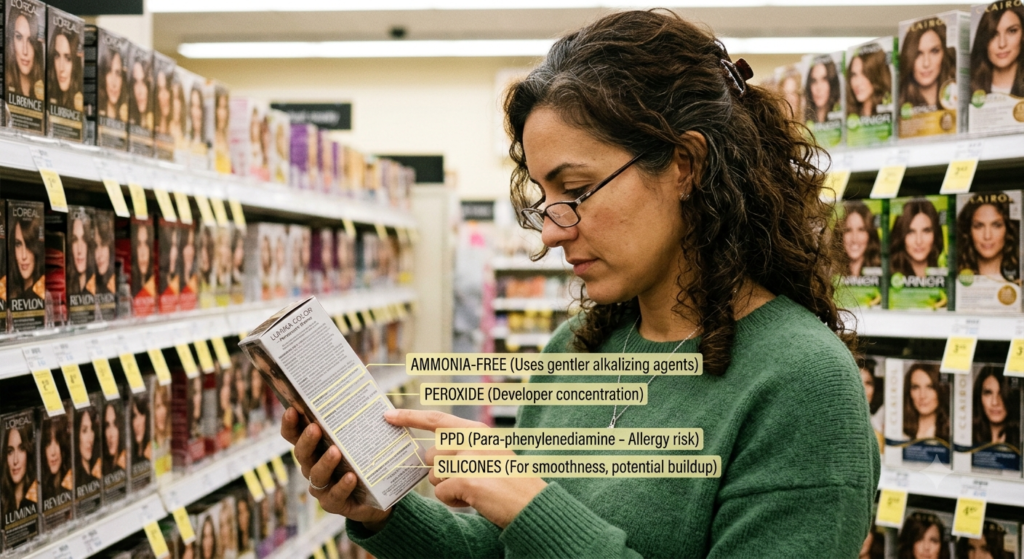
Shade names and box promises get all the attention, but the ingredient list is where you can actually predict how your hair will feel afterward — not just how it will look.
Ammonia This is what allows permanent dye to lift natural pigment, but it’s also the main reason permanent color can leave hair feeling rough or straw-like. Ammonia-free formulas use gentler alkalizing agents instead, which is a meaningful difference if you’re coloring frequently, not just a marketing label. The tradeoff: ammonia-free permanent dye sometimes needs slightly longer processing time to fully lift and cover gray.
Peroxide (developer) concentration Usually listed in “volume” (10, 20, 30, 40). Higher volume means more lift but also more potential dryness. For gray coverage without a big color change, a lower volume paired with a gray-specific formula is often more than enough — you don’t need the strongest developer on the shelf just because it’s available.
PPD (para-phenylenediamine) This is the ingredient behind most hair dye allergic reactions, including scalp swelling and contact dermatitis. It’s present in the vast majority of permanent dyes, including “natural-looking” and PPD-labeled boxes. If you’ve never dyed your hair before, or if you’ve had a reaction to dye previously, a patch test 48 hours before full application isn’t optional — it’s the only way to know in advance.
Silicones and conditioning polymers These coat the hair shaft and are largely responsible for that “smoother, shinier” feel right after box dye. They’re genuinely helpful for damaged hair, but heavy silicone buildup over time can create a barrier that makes it harder for color to absorb evenly on your next dye job. If you notice color grabbing less each time you re-dye, a clarifying wash beforehand often solves it.
Natural or “clean” dye alternatives (like henna) These skip synthetic chemicals entirely but come with real tradeoffs: results are harder to predict, they can’t lighten hair, and they build up on the hair shaft in a way that makes future chemical dyeing (including bleach) unpredictable or even risky. If you’re considering switching to a chemical dye later, it’s worth knowing that upfront rather than after a henna-based color job.
None of this means you need a chemistry background to buy hair dye. It means reading past the shade name on the front of the box to the ingredient panel on the back, especially if you have sensitive skin, frequent scalp irritation, or a history of reactions.
Box Dye vs. Professional Color: When Each One Actually Makes Sense
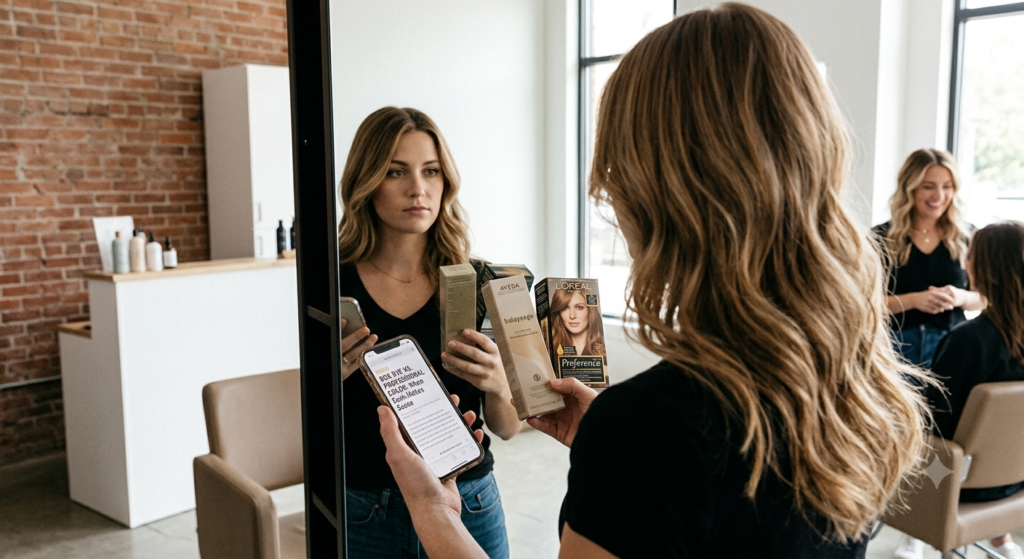
This isn’t a case of one option being universally better — it’s about matching the method to the complexity of what you’re trying to achieve.
Box dye makes sense when:
- You’re doing an all-over single-process color, especially close to your natural shade
- You’re covering gray with a consistent, repeatable routine
- Your hair hasn’t been chemically treated in a way that makes the outcome unpredictable
- Budget and convenience matter more than a highly customized result
Professional color makes more sense when:
- You want to go noticeably lighter or darker than your current color, especially by more than two levels
- You have previous color, highlights, or chemical treatments that create uneven porosity
- You’re trying to correct an existing color mistake (color correction is genuinely difficult to do safely at home)
- You want dimension — multiple tones, balayage, or lived-in color — rather than one flat shade
A pattern worth naming: a lot of at-home color regret doesn’t come from bad products, it comes from asking a single-process box dye to do a job it was never designed for, like lifting four levels or correcting brassy, uneven previous color. In those cases, the smarter move is a one-time professional appointment to reset your base, and then maintaining that result with box or demi-permanent color at home afterward.
Application Mistakes That Ruin Even Good Dye
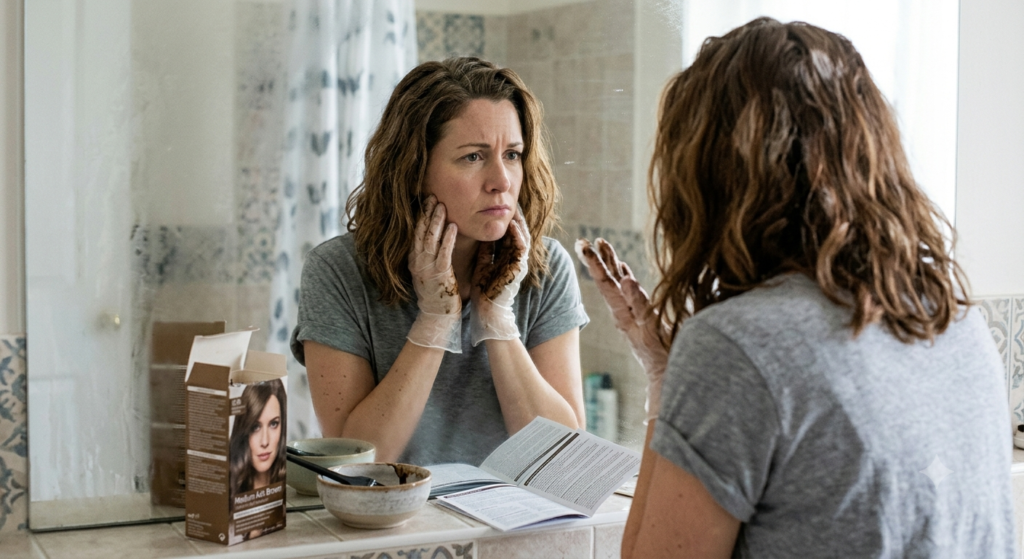
You can buy the right product and still get a disappointing result if the application goes wrong. These are the mistakes that come up again and again.
- Skipping the strand test. This single step prevents most “this isn’t the color I expected” situations. Processing time and color development vary by your hair’s actual condition, not just the picture on the box.
- Applying dye to already-clean, freshly washed hair. Natural oils from a day or two of not washing actually protect the scalp during processing. Squeaky-clean hair right before dyeing increases scalp irritation risk.
- Rushing the processing time. Pulling color out early because you’re worried about damage often results in patchy, faded coverage — the opposite of what you were trying to avoid.
- Applying color to dry, un-sectioned hair. Even, four-section application (not just “globbing it on”) is what prevents missed spots, especially at the crown and nape, which are the two most commonly under-processed areas.
- Ignoring the instructions’ specific timing for gray coverage. Gray hair often needs the longer end of the processing window listed on the box. Using the “quick” time listed for general color usually leaves gray only partially covered.
- Mixing old dye with a new box “to make it stretch.” Developer loses potency once exposed to air, and mixing inconsistent batches leads to uneven color — a mistake that seems harmless but is a common cause of patchy results.
How to Make Color Last Longer After Dyeing
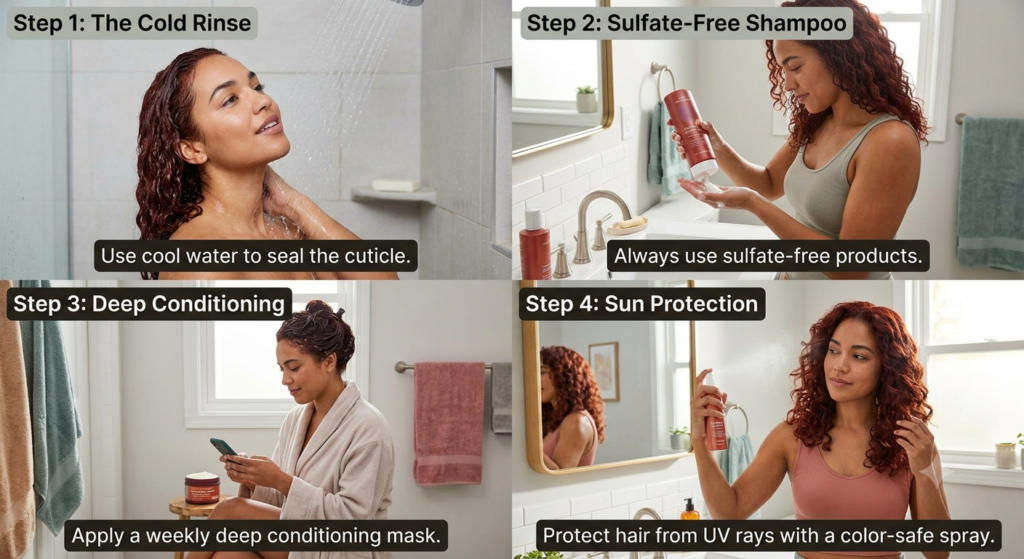
The dye job is only half the equation — how you treat your hair afterward determines whether that color still looks good in three weeks or has already faded and turned brassy.
- Wait at least 48 hours before the first wash. The hair cuticle needs time to fully close and seal in color. Washing too soon is one of the fastest ways to lose vibrancy, especially with semi-permanent color.
- Switch to a color-safe, sulfate-free shampoo. Sulfates strip color faster than almost anything else you’ll do post-dye. This one swap has more impact on color longevity than most “color-protecting” serums.
- Wash in cool or lukewarm water, not hot. Heat opens the cuticle and accelerates fading — this applies every single wash, not just the first one.
- Use a color-depositing conditioner between full dye sessions. These refresh tone and cover mild fading without the commitment of another full processing session, extending the time between dye jobs.
- Protect hair from chlorine and sun exposure. Both cause noticeable color shift, especially in reds and vivid fashion colors, which fade fastest of all color categories.
- Space out heat styling or use a heat protectant every time. Repeated heat exposure breaks down color molecules faster than washing alone.
Frequently Asked Questions
Can I dye my hair a lighter shade with a permanent box dye at home? Box dye can lift hair a shade or two lighter, but going more than two levels lighter — especially from dark brown or black — usually requires pre-lightening or bleach, which is harder to control safely at home. For a significant lightening change, a professional consultation is worth the cost to avoid uneven or brassy results.
Why did my hair color turn out different than the box picture? The shade shown on the box is typically modeled on hair that’s already a certain base level. Your actual result depends on your natural or existing color underneath, hair porosity, and how long you process — which is exactly why the strand test matters more than the box photo.
How often can I safely re-dye my hair without damage? Permanent color is generally safe to redo every 4–6 weeks for regrowth touch-ups. Full re-dyeing of already-colored lengths more frequently than that significantly increases dryness and breakage risk, especially without a repair or bond-building treatment in between.
Is it normal for hair dye to smell strong, and does a stronger smell mean stronger color? A noticeable smell, usually from ammonia or its substitutes, is normal and doesn’t correlate with how well the color will perform. Some ammonia-free formulas have a milder smell but still deliver full permanent color; the odor is a byproduct of the alkalizing process, not an indicator of strength or effectiveness.
Can I color my hair while pregnant or breastfeeding? Most dermatologists consider occasional hair dyeing low-risk during pregnancy since very little of the chemical is absorbed through the scalp, but many people choose to wait until after the first trimester or opt for ammonia-free or highlights-only techniques that avoid direct scalp contact. This is a personal risk-tolerance decision worth discussing with your doctor rather than something a product label can answer for you.
Final Takeaways
The best hair dye for you isn’t the highest-rated product overall — it’s the one that matches your hair’s current condition and your actual color goal. A few things to carry forward:
- Match the category (permanent, demi, or semi) to your goal before you even look at shades.
- Gray coverage requires permanent dye — no gentler option fully covers it.
- Most disappointing results trace back to application mistakes, not the product itself.
- What you do in the 48 hours after dyeing matters almost as much as the dye job itself.
If you’re coloring at home for the first time, start with a strand test and a formula one step gentler than you think you need. It’s easier to add more color in a follow-up session than to undo damage from a formula that was too aggressive for your hair’s condition.