Foundation isn’t required for makeup to look finished. A lot of people skip it because it feels heavy by midday, settles into fine lines, or takes too long on a rushed morning. What makes a no-foundation face look intentional is where you put the color and what you leave alone.
This guide walks through an everyday routine built on four ideas: prepare the skin, correct only what bothers you, add color to the cheeks, and define the brows and eyes lightly. You’ll also find product types worth considering, the trade-offs of each, and common mistakes that make a foundation-free face look unfinished.
Why Skipping Foundation Works (and When It Doesn’t)
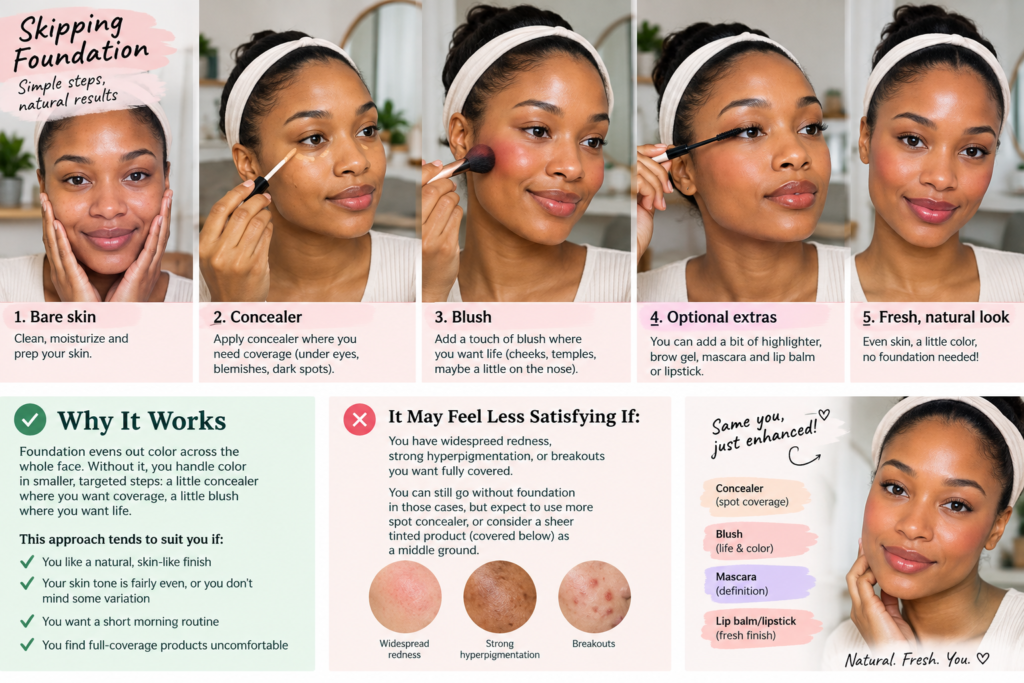
Foundation evens out color across the whole face. Without it, you handle color in smaller, targeted steps: a little concealer where you want coverage, a little blush where you want life.
This approach tends to suit you if:
- You like a natural, skin-like finish
- Your skin tone is fairly even, or you don’t mind some variation
- You want a short morning routine
- You find full-coverage products uncomfortable
It may feel less satisfying if you have widespread redness, strong hyperpigmentation, or breakouts you want fully covered. You can still go without foundation in those cases, but expect to use more spot concealer, or consider a sheer tinted product (covered below) as a middle ground.
Step 1: Prep the Skin, Because It Is the “Base” Now
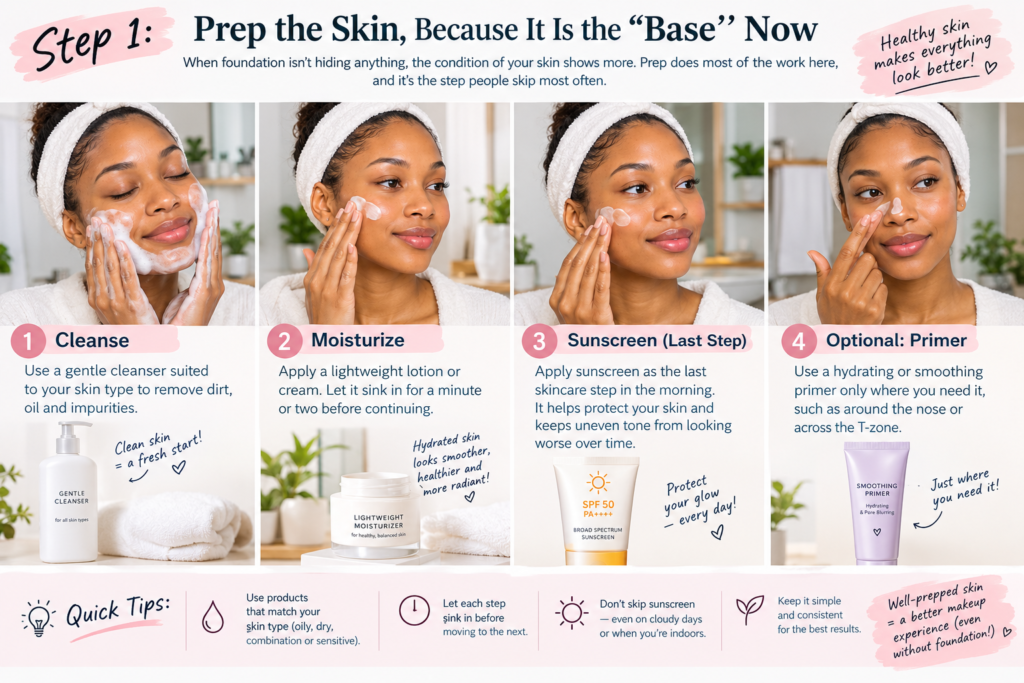
When foundation isn’t hiding anything, the condition of your skin shows more. Prep does most of the work here, and it’s the step people skip most often.
A simple prep sequence
- Cleanse with a gentle cleanser suited to your skin type.
- Moisturize with a lightweight lotion or cream. Let it sink in for a minute or two before continuing.
- Apply sunscreen as the last skincare step in the morning. Sunscreen also helps keep uneven tone from looking worse over time.
- Optional: use a hydrating or smoothing primer only where you need it, such as around the nose or across the T-zone.
Product types to consider
Lightweight moisturizer

Best For: Anyone who wants makeup to sit smoothly without feeling greasy.
Why Consider It: Dry or flaky patches show up more without foundation, and a well-hydrated surface helps cream products blend easily.
Pros:
- Makes cream blush and concealer easier to blend
- Simple to build into an existing routine
- Available for different skin types (gel, lotion, rich cream)
Cons:
- A formula that’s too rich can make makeup slide or look shiny on oily skin
- Some formulas contain fragrance, which may bother sensitive skin
What to Consider Before Buying: Check the ingredient list if you have sensitive skin or known allergies, and patch test a new product on a small area first. Look for wording like “non-comedogenic” if you’re breakout-prone, but remember that labels aren’t a guarantee for every person.
Verdict for This Specific Use: A good fit for nearly everyone. Choose a gel or lotion texture if you run oily, and a cream if your skin runs dry. (Insert Amazon link with a neutral call to action, such as “Check the current Amazon listing.”)
Daily facial sunscreen

Best For: Anyone wearing makeup without foundation, since you lose the small amount of sun protection some foundations provide, which shouldn’t be relied on anyway.
Why Consider It: It protects the skin you’re leaving exposed, and some formulas also leave a smooth, slightly luminous finish.
Pros:
- Protects skin that’s on show all day
- Many modern formulas are light and wear well under makeup
- Some have a sheer tint or no white cast
Cons:
- Finding a formula that doesn’t pill or feel greasy can take trial and error
- Mineral formulas can leave a visible cast on deeper skin tones
What to Consider Before Buying: Check the SPF, whether it’s labeled broad-spectrum, and the texture. Follow the product’s directions for how much to apply. If you have sensitive or reactive skin, patch testing is sensible.
Verdict for This Specific Use: Worth prioritizing over nearly every other product in this article. If one formula pills under makeup, try a different texture before giving up on sunscreen entirely.
Step 2: Spot-Conceal Only What You Want Covered
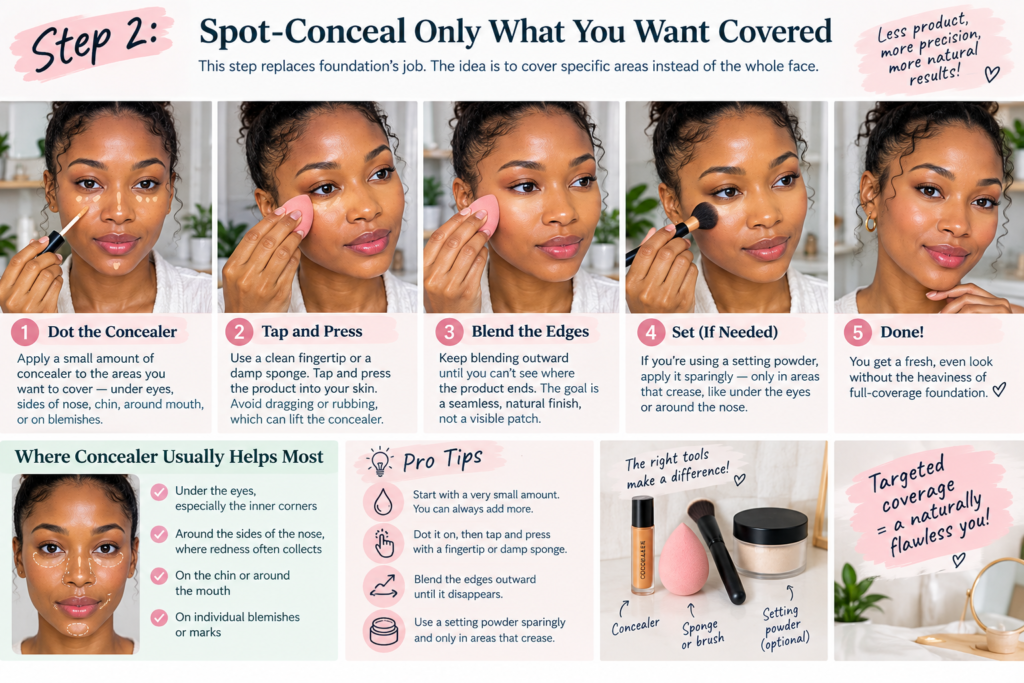
This step replaces foundation’s job. The idea is to cover specific areas instead of the whole face.
Where concealer usually helps most
- Under the eyes, especially the inner corners
- Around the sides of the nose, where redness often collects
- On the chin or around the mouth
- On individual blemishes or marks
How to apply it so it looks natural
- Start with a very small amount. You can always add more.
- Dot it on, then tap and press with a fingertip or a damp sponge. Dragging or rubbing tends to lift it.
- Blend the edges outward until you can’t see where the product ends.
- If you use a setting powder, use it sparingly and only in areas that crease.
Product types to consider
Lightweight liquid or serum-style concealer

Best For: Everyday wear, especially if you have dry or mature skin.
Why Consider It: Thinner formulas look more like skin and are less likely to settle into fine lines.
Pros:
- Natural finish
- Easy to build in thin layers
- Comfortable under the eyes
Cons:
- Lower coverage for stubborn discoloration
- May fade faster on very oily skin
What to Consider Before Buying: Shade matching matters more here than anywhere else. Many brands offer undertone options (warm, cool, neutral), so check the shade descriptions, and compare against your jawline or the side of your neck when you can. Return policies vary, so check them before you buy.
Verdict for This Specific Use: A solid starting point for most people. If you want more coverage on blemishes, a slightly thicker formula used only on those spots is a sensible second option.
Tinted moisturizer or skin tint (optional middle ground)

Best For: People who want a bit more evenness than concealer alone without the feel of full foundation.
Why Consider It: It’s sheer, so it softens redness and unevenness while still letting your skin show through.
Pros:
- Faster than concealer plus blending in multiple spots
- Usually feels light on the face
- Often combines moisturizing or sunscreen benefits (check the label for exact claims)
Cons:
- Fewer shade options in some lines
- Less coverage than foundation, which may disappoint some people
What to Consider Before Buying: Decide whether you want it for evenness or as a sunscreen substitute. If SPF matters to you, check that the product provides an SPF you’d rely on and that you’d apply enough of it, since tints are often used in smaller amounts.
Verdict for This Specific Use: Makes sense if you want a stepping stone between no foundation and full foundation. If you only want to cover a few spots, you may not need it.
Step 3: Add Color Where Foundation Would Have Been Flat
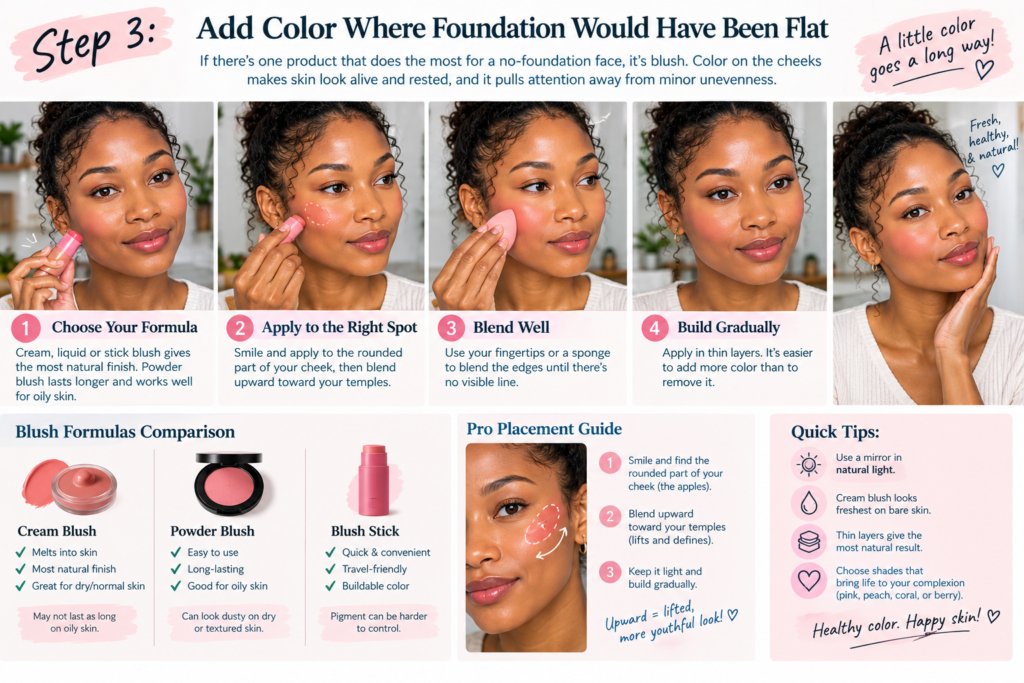
If there’s one product that does the most for a no-foundation face, it’s blush. Color on the cheeks makes skin look alive and rested, and it pulls attention away from minor unevenness.
How to choose a blush formula
- Cream or liquid blush melts into the skin and looks the most natural without foundation underneath.
- Powder blush is easy to use and lasts well on oilier skin, but it can look dusty on dry or textured areas.
- Blush sticks are quick and travel-friendly, though the amount of pigment is harder to control.
Placement tips
- Smile and apply to the rounded part of your cheek, then blend upward toward your temples.
- Blend the edges of cream products with fingertips or a sponge until there’s no visible line.
- Apply in thin layers. It’s easier to add than to remove.
Product types to consider
Cream blush (stick, pot, or liquid)

Best For: A fresh, skin-like finish, especially for normal to dry skin.
Why Consider It: Cream formulas blend into bare or lightly prepped skin and don’t sit on top of it.
Pros:
- Looks natural without base makeup
- Can often be used on cheeks and lips
- Usually quick to apply with your fingers
Cons:
- Can slide or fade on very oily skin
- Some are more pigmented than they look, so it’s easy to overdo
What to Consider Before Buying: Consider your undertone and how bold you like your makeup. Soft peaches and rose shades are easier to wear daily than very bright colors. If you have sensitive skin, check ingredients (especially fragrance) and patch test.
Verdict for This Specific Use: A strong first purchase for a foundation-free routine. If your skin is oily, consider powder blush, or set a cream blush lightly.
Step 4: Define the Brows and Eyes Lightly
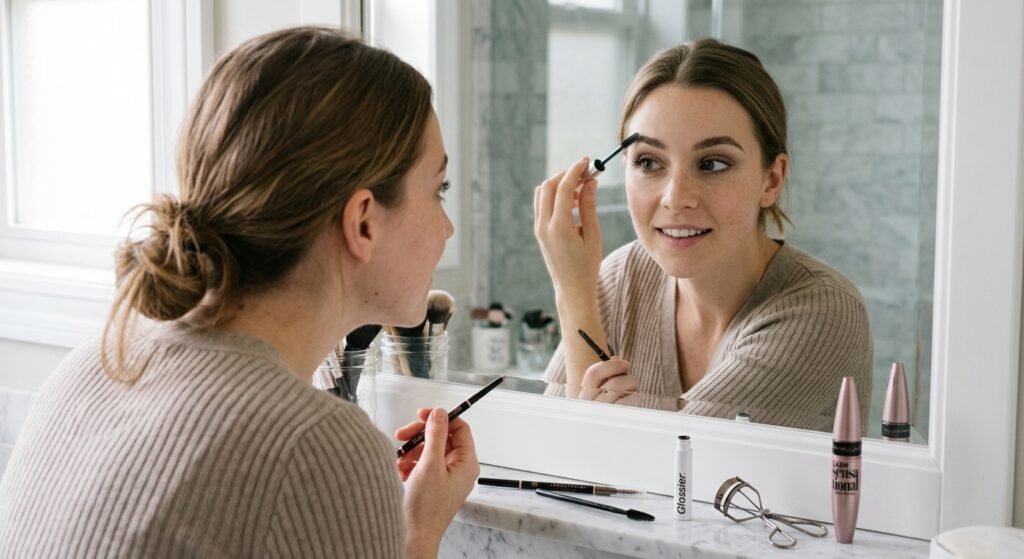
Brows frame the face, and when they’re tidy, the rest of your makeup can stay minimal and still look deliberate.
A simple eye and brow routine
- Brows: Brush them upward, then fill sparse areas with light, short strokes. Finish with a clear or tinted gel if you like them to stay in place.
- Eyes: Curl your lashes if you like, then apply one or two coats of mascara. Stay light on the lower lashes if you tend to smudge.
- Optional: Add a neutral, single-color eyeshadow or a thin line of eyeliner close to the lash line.
Product types to consider
Brow gel or fine-tip brow pencil

Best For: Anyone who wants neater brows without a heavily drawn look.
Why Consider It: Brow products keep your face looking put-together even when everything else is minimal.
Pros:
- Quick and low effort
- Available in clear and tinted options
- Small changes make a visible difference
Cons:
- Shade matching can be tricky, and colors may look different on the brow than in the package
- Over-filling can look harsh
What to Consider Before Buying: Pick a shade close to your natural brow color or one shade softer. If you have little brow hair, a fine-tip pencil gives more control, and if you have plenty, a gel may be enough.
Verdict for This Specific Use: Worth having if you want a quick polish. Skip it if your brows already look the way you like.
Everyday mascara

Best For: Adding definition with minimal effort.
Why Consider It: Opening up the eyes can make a bare face look awake without any other eye makeup.
Pros:
- Fast, familiar step
- Wide range of formulas, including lengthening, volumizing, and waterproof
Cons:
- Waterproof formulas can be harder to remove
- Mascara shouldn’t be used past the window recommended on the packaging, so it needs replacing
What to Consider Before Buying: Think about whether you want length, volume, or separation, and whether your eyes are sensitive to fragrance or certain ingredients. Discontinue use if you notice irritation.
Verdict for This Specific Use: One of the most worthwhile products in a minimal routine. Most people can get by with a simple, reliable formula.
Step 5: Finish Lips and Skin
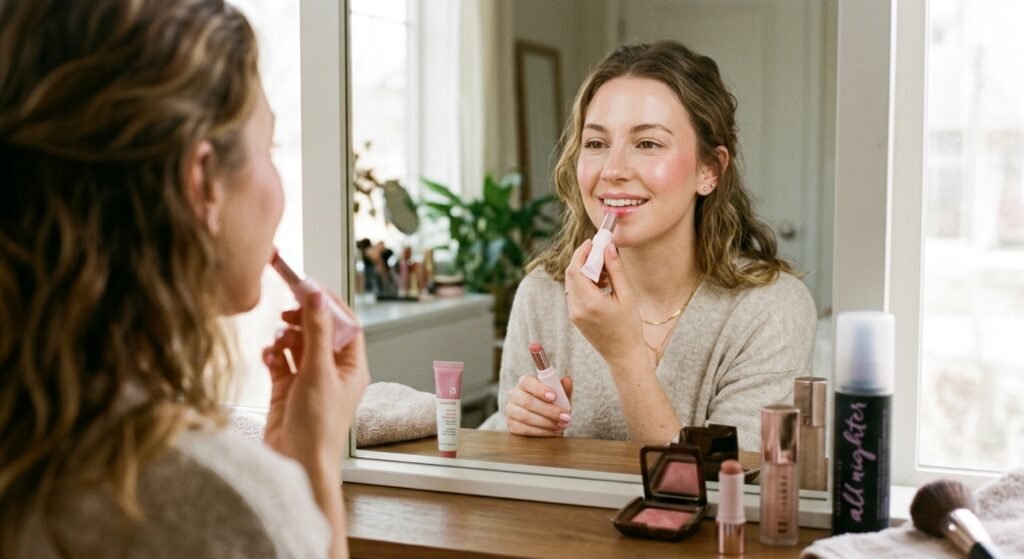
A lip color that matches the blush makes the face look coordinated with very little effort.
- Tinted lip balm or sheer lip color: Comfortable and forgiving, since it doesn’t need precise application.
- A little highlighter (optional): Tap a small amount on the tops of the cheekbones. Skip it if your skin is already shiny.
- Setting spray or light powder (optional): Use only where you get shiny, such as the T-zone.
Quick Product Comparison
| Product Type | Best For | Key Feature | Main Advantage | Potential Drawback |
|---|---|---|---|---|
| Lightweight moisturizer | Smooth makeup application | Hydration | Easier blending | Can feel heavy on oily skin |
| Daily sunscreen | Everyone | Sun protection | Protects exposed skin | May pill under makeup |
| Liquid concealer | Natural coverage | Thin, skin-like texture | Less creasing | Lower coverage |
| Skin tint | Light, even look | Sheer wash of color | Quick and easy | Limited coverage |
| Cream blush | Fresh, natural finish | Melts into skin | Looks like real flush | May fade on oily skin |
| Brow gel/pencil | Tidy, framed face | Light definition | Fast polish | Shade matching |
| Mascara | Defined eyes | Lash emphasis | Quick, familiar | Needs replacing |
Check each Amazon listing for current shade ranges, ingredients, sizes, and pricing before you buy.
The 5-Minute Routine at a Glance
- Cleanse, moisturize, sunscreen
- Concealer under the eyes and around the nose, tap to blend
- Cream blush on cheeks, blended upward
- Brow gel or light fill
- Mascara
- Tinted lip balm
Common Mistakes to Avoid
Using too much concealer. A thick layer looks cakey and makes the skin look dry. Start small.
Skipping skin prep. Without foundation to smooth things over, dry patches and texture become more visible.
Choosing the wrong shade. Concealer that’s too light creates a grey or ashy patch, and too dark can look dirty. Match your undertone as well as your depth.
Applying blush too low or too close to the nose. Keep it on the apples and blend toward the temples for a lifted look.
Over-powdering. Powder can make a bare face look flat. Use it only where shine bothers you.
Expecting it to look like foundation. The goal is fresh, not flawless. Some visible skin texture is normal, and it’s part of why this look reads as natural.
What to Choose If…
- Your skin is oily: Go with a lightweight moisturizer, a matte or powder blush, and a very light dusting of powder in the T-zone.
- Your skin is dry: Use a hydrating moisturizer, liquid concealer, and cream blush.
- Your skin is sensitive: Choose fragrance-free products where possible, introduce one new product at a time, and patch test.
- You’re short on time: Do sunscreen, a cream blush stick, brow gel, and mascara.
- You’re on a budget: Prioritize sunscreen, concealer, and a cream blush. Skip the rest until you know you’ll use them.
- You already own similar products: You likely don’t need new ones. A cream blush you already have can often double as lip color.
FAQ
Can I wear makeup without foundation if I have acne or redness?
Yes, but you may want a little more spot coverage. Use a thin layer of concealer on the areas that bother you, and consider a sheer skin tint if you want light overall evenness. If your skin is irritated or persistent, a dermatologist can advise on care for your specific situation.
Do I still need sunscreen if I’m not wearing foundation?
Yes. Sunscreen is part of skincare, and it isn’t replaced by makeup. Apply it as the last step of skincare before makeup.
What should I apply first, concealer or blush?
With cream products, concealer goes first, then blush. That way blush won’t get disturbed while you blend concealer. If you use powder blush, apply it after any setting powder.
How do I keep makeup from looking patchy?
Prep skin with moisturizer, let it absorb, and use thin layers. Blend with fingertips or a damp sponge so edges disappear.
Will this routine last all day?
That depends on your skin type, climate, and the products you pick. Cream products may fade sooner on oily skin, so a light set of powder or a small touch-up can help.
Conclusion
A foundation-free routine comes down to a few reliable steps: prep the skin, cover only what bothers you, add color to your cheeks, and define your brows and lashes lightly. You don’t need all of the products above. If you’re starting from scratch, the most useful order to buy in is sunscreen, concealer, cream blush, and mascara.
Try the routine for a week with what you already own, and notice which steps you’d actually miss. Fill those gaps first, compare listings on shade range, ingredients, and return policy, and add extras only if they earn a place in your routine.