Somewhere between “I’ll just book a salon appointment” and “$180 for roots, no thanks,” most of us end up standing in the hair color aisle, staring at forty boxes that all promise the same shiny, magazine-worthy result.
Here’s the thing colorists rarely say out loud: the products aren’t usually the problem. The mismatch between product and hair type, porosity, or technique is. A box of dye that works beautifully on fine, virgin hair can turn brassy or patchy on color-treated or coarse hair — not because the formula is bad, but because it was never right for that hair in the first place.
This guide breaks down the best hair coloring products at home by hair type and goal, explains the real differences between permanent, demi-permanent, and semi-permanent formulas, and walks through the mistakes that cause most DIY color disasters. By the end, you’ll know exactly which product category fits your hair and how to apply it so it actually lasts.
How to Choose the Right Shade for Your Skin Tone
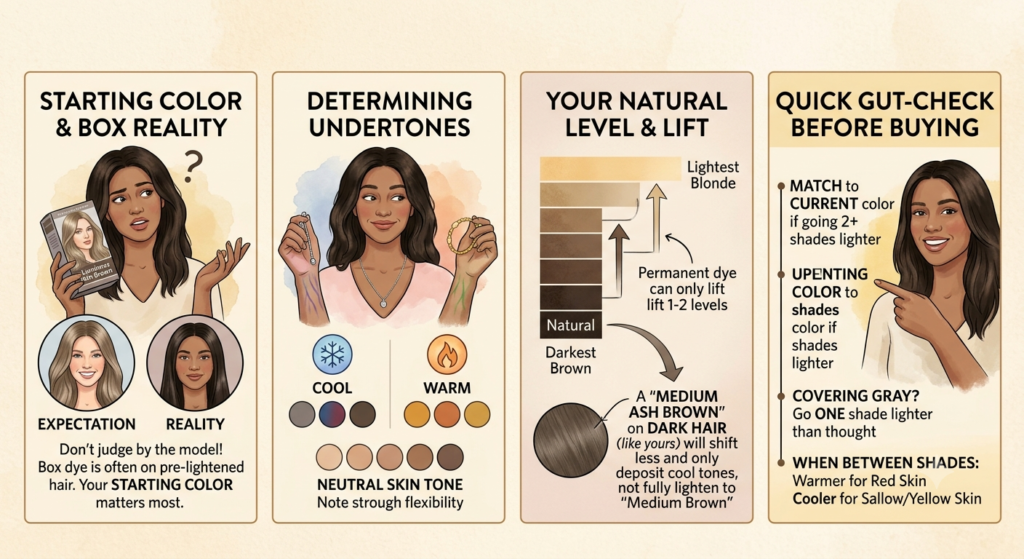
Picking a shade off the box based on the model’s photo is the single most common reason at-home color doesn’t match expectations. Box photography is shot on hair that’s already been professionally lightened or prepped — your starting color changes the outcome more than the box does.
A more reliable approach:
- Cool/pink undertones (veins look blue-purple, silver jewelry suits you) tend to look best in ash, cool brown, or blue-based reds.
- Warm undertones (veins look green, gold jewelry suits you) usually suit golden, copper, or honey-based shades.
- Neutral undertones have the most flexibility and can wear both warm and cool shades without looking washed out.
A detail most box dye instructions skip: your natural level (how light or dark your hair is) determines how the shade actually shows up. A “medium ash brown” on dark brown hair will look almost identical to your natural color. The same box on light brown hair can shift noticeably cooler. As a rule of thumb, permanent dye can typically lift natural hair one to two shades lighter, but it cannot lighten previously dyed hair — it can only deposit color on top of it.
Quick gut-check before buying:
- Match the shade to your current color, not your goal color, if you’re going more than two shades lighter.
- If you’re covering gray, choose one shade lighter than you think you need — gray hair processes color differently and often looks darker once dyed.
- When between two shades, go warmer if your skin has any redness, and cooler if you tend toward sallow or yellow tones.
Semi-Permanent vs. Demi-Permanent vs. Permanent: What’s the Difference
This is where most first-time buyers get overwhelmed, and it’s genuinely the most important decision in the whole process — more important than brand.
| Formula Type | Lasts | Covers Gray? | Lightens Hair? | Best For |
|---|---|---|---|---|
| Semi-permanent | 4–8 washes | No | No | Testing a color, refreshing faded ends, low commitment |
| Demi-permanent | 4–6 weeks | Partial (blends, doesn’t fully cover) | No | Tone correction, subtle gray blending, healthier-hair option |
| Permanent | Until it grows out | Yes, fully | Yes (1–2 levels) | Full gray coverage, dramatic color change |
Semi-permanent formulas coat the hair shaft without opening the cuticle, which is why they fade rather than grow out with a visible line. They’re the gentlest option and a smart way to test a shade before committing.
Demi-permanent uses a low-volume developer (or none at all) to deposit color slightly beneath the cuticle. It’s the category most professional colorists reach for when a client wants “less commitment” or has damaged hair that can’t tolerate ammonia.
Permanent dye opens the cuticle fully using ammonia (or an ammonia substitute) and peroxide, allowing it to both lift natural pigment and deposit new color. It’s the only category that reliably covers 100% gray and the only one that can lighten hair — which also makes it the most damaging if overused.
A mistake worth flagging: many people default to permanent color out of habit, even when they only want to refresh tone or blend a few grays. Demi-permanent often gets the same visual result with far less cumulative damage.
Best Hair Coloring Products by Hair Type
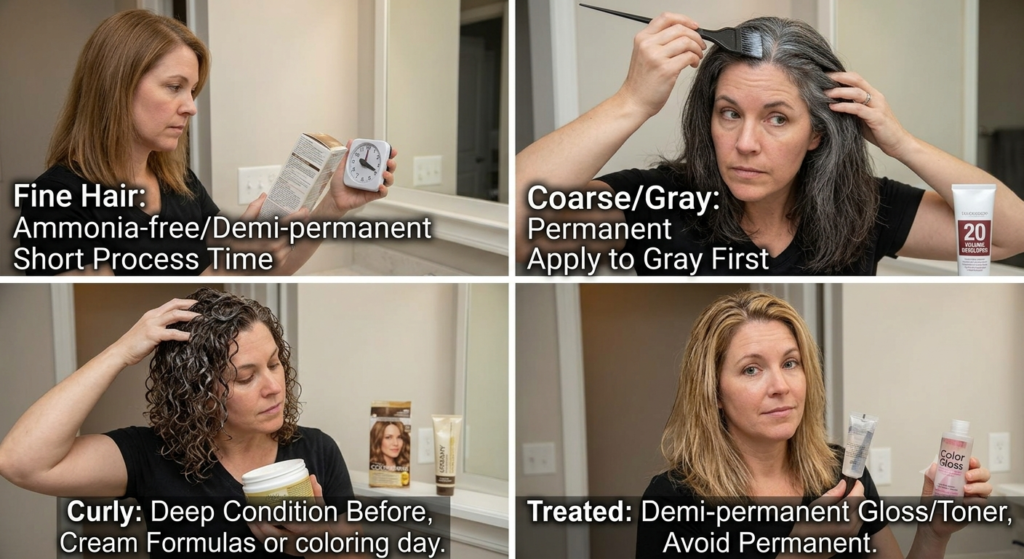
Not every “best hair coloring product” list accounts for the fact that fine, coarse, curly, and chemically treated hair absorb color completely differently. Here’s how to shop by texture instead of just by brand reputation.
For Fine or Thin Hair
Fine hair is more porous at the ends and processes color faster, which means it’s prone to grabbing too much pigment and looking flat or overly saturated.
- Look for ammonia-free permanent formulas or demi-permanent kits — they process more gently and reduce the risk of over-darkening.
- Avoid leaving color on for the maximum time listed “just to be safe.” Fine hair often needs less processing time than the box suggests.
For Coarse or Resistant Hair (Including Gray Coverage)
Coarse hair has a thicker cuticle layer, which makes it harder for color to penetrate — this is also why gray hair (which is coarser and less pigmented) resists color more than the rest of the head.
- Permanent, higher-developer-volume kits (20 volume) work more reliably than gentler formulas.
- Applying color to gray-heavy sections first, before the rest of the head, gives those stubborn strands extra processing time without over-processing the rest.
For Curly or Textured Hair
Curly hair is typically drier and more porous due to the cuticle’s natural lift, so it absorbs color quickly but also fades faster.
- Cream-based (not liquid) permanent or demi-permanent formulas distribute more evenly through curl clumps and cause less frizz disruption than liquid applicators.
- A pre-color deep conditioning treatment 24–48 hours before dyeing helps even out porosity so color doesn’t grab unevenly at the ends versus the roots.
For Previously Colored or Chemically Treated Hair
This is the highest-risk category for breakage, and also where product choice matters most.
- Demi-permanent or gloss/toner-style products are generally safer than another round of permanent color, especially if hair has been lightened before.
- Avoid combining a new permanent color with hair that’s been bleached within the last two weeks — the cumulative chemical processing is a leading cause of at-home color turning to breakage.
Step-by-Step: How to Apply At-Home Color for the Best Results
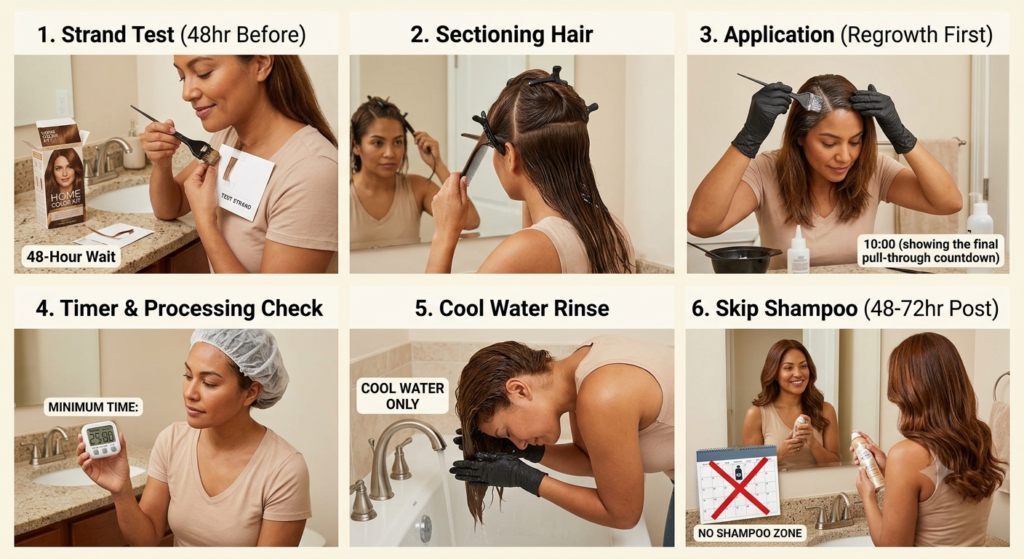
- Do a strand test 48 hours before your full application — not for allergies alone, but to see how your actual hair (not the box model’s hair) responds to the formula.
- Section hair into four quadrants using clips before you start. Working section by section prevents missed spots and uneven saturation, which is the most common cause of patchy at-home color.
- Apply to regrowth first if touching up roots, then pull color through the lengths only in the last 10–15 minutes of processing time — lengths absorb color faster since they’re more porous than new growth.
- Set a timer and check color at the minimum processing time, not the maximum. You can always leave color on longer; you can’t undo over-processing.
- Rinse with cool water, not hot. Hot water opens the cuticle further and pushes more color out than it locks in.
- Skip shampoo for the first 48–72 hours after coloring. This gives the cuticle time to close fully, which significantly improves how long color lasts.
Common At-Home Coloring Mistakes (and How to Avoid Them)
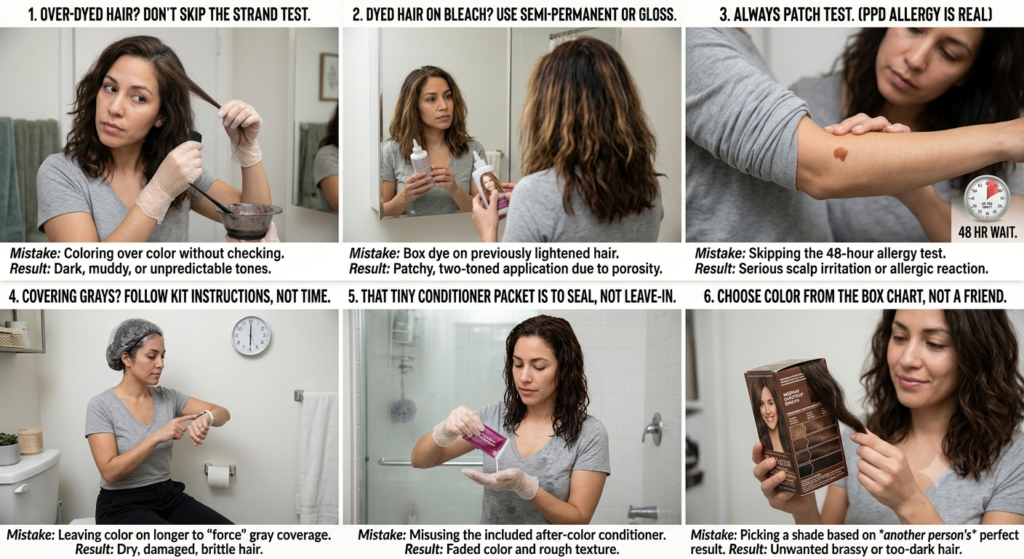
- Coloring over color without a strand test. If hair has been dyed before, especially multiple times, new color can react unpredictably — sometimes turning muddier or darker than the box shade.
- Using box dye on hair that’s already bleached or heavily highlighted. The porosity difference between virgin and lightened hair means color absorbs unevenly, often resulting in patchy, two-toned results.
- Skipping the patch test. Allergic reactions to PPD (a common dye ingredient) can develop even in people who’ve used the same product for years without issue. A patch test 48 hours before full application is non-negotiable, not optional.
- Over-processing to “make sure it covers gray.” Leaving color on longer than instructed doesn’t improve gray coverage much beyond the recommended time — it just increases damage risk.
- Applying conditioner from the color kit incorrectly. The small conditioner packet included in most kits is formulated to seal the cuticle after color, not to detangle. Using it as a leave-in or skipping it entirely both shorten how long the color lasts.
- Choosing a shade based on a friend’s results. The same box shade looks different on different starting hair colors — a friend’s “perfect chestnut brown” was likely on a different base color than yours.
How to Maintain Color-Treated Hair Between Applications
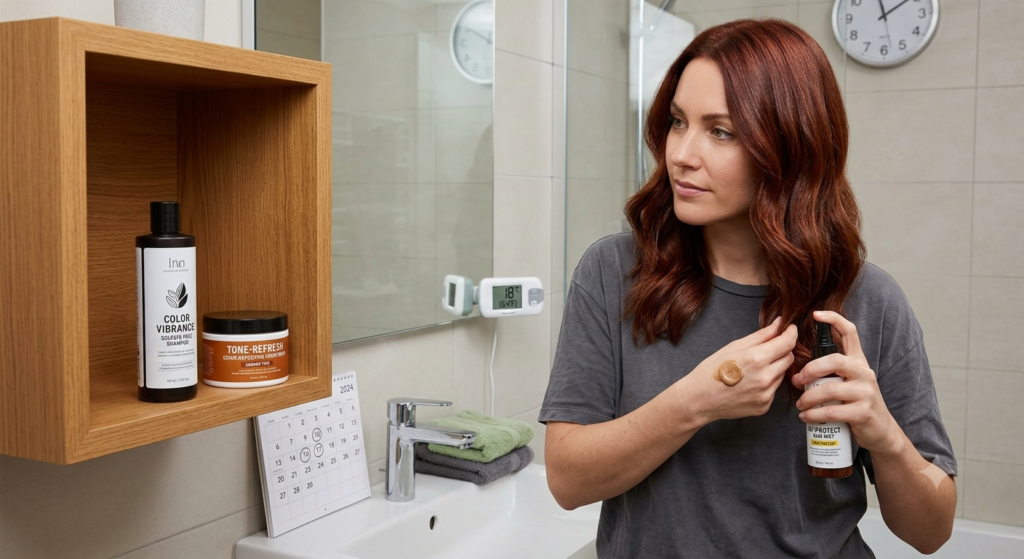
At-home color fades faster than salon color mainly because of aftercare gaps, not product quality.
- Switch to a sulfate-free shampoo. Sulfates strip pigment molecules along with dirt and oil, which is the single biggest cause of premature fading.
- Wash with cool or lukewarm water. Every hot shower gradually lifts the cuticle and releases a small amount of color.
- Use a color-depositing conditioner between full applications. These refresh tone on the surface without another full chemical process, extending time between root touch-ups or full-color sessions.
- Apply a UV-protectant product before sun exposure. UV rays break down hair dye molecules similarly to how they fade fabric — this is especially noticeable on red and copper tones, which fade fastest of all shades.
- Space out touch-ups by root growth, not by a fixed calendar date. Hair grows at different rates; a rigid “every 6 weeks” schedule can mean touching up too early (extra chemical exposure) or too late (visible regrowth line).
Frequently Asked Questions
How long should I wait between at-home hair coloring sessions? For root touch-ups, wait until you see about half an inch of regrowth — usually 4–6 weeks, though this varies by hair growth rate. For a full color change, wait at least 6–8 weeks between permanent applications to limit cumulative damage.
Can I use permanent and semi-permanent color in the same routine? Yes — many people use permanent color for root coverage every 6–8 weeks and a semi-permanent gloss or color-depositing conditioner in between to refresh tone without additional chemical processing.
Why did my at-home hair color turn out brassy? Brassiness usually happens when natural underlying pigment (often orange or yellow) shows through a color that wasn’t deep or ash-toned enough to neutralize it. This is common when going lighter than your natural level or when color has faded unevenly.
Do I need a different product if I have gray hair? Not necessarily a different product, but gray hair does need a formula and processing time built for full coverage — permanent dye designed for resistant or gray hair typically has a more concentrated developer that helps color penetrate the coarser gray strand.
Conclusion
The best hair coloring products at home aren’t necessarily the priciest or most-hyped ones — they’re the ones matched correctly to your hair type, porosity, and desired level of commitment. A semi-permanent gloss, a demi-permanent kit, and a full permanent box dye are solving three different problems, and picking the wrong category is where most at-home color disappointments start.
If you’re coloring at home for the first time, start with a strand test, choose your formula type based on how long you want the color to last (not just gray coverage), and follow the aftercare steps above to protect your investment. Once you’ve found the shade and formula that work with your hair rather than against it, at-home color can hold up just as well as a salon visit — for a fraction of the cost and time.